Picture this: It’s 3 AM, you’re on your fourth coffee, and you’re still editing photos from your latest shoot. The images are beautiful, but you’re drowning in hundreds of photos that need to be processed and delivered. Sound familiar?
I’ve been there. Just three years ago, I was spending 5-7 hours editing a single session. Between color correcting tricky lighting scenarios, perfecting skin tones, and achieving a consistent look across hundreds of images, I was constantly behind schedule. My clients were waiting weeks for their galleries, and I was missing out on new opportunities because I was always buried in post-processing.
Then I discovered something that completely changed my photography business: a systematic Lightroom presets workflow that cut my editing time by 83%.
But first, grab my free Lightroom keyboard shortcuts guide – these time-savers alone can cut 20-30% off your editing time immediately, and they work perfectly with any preset system.
Today, I’ll walk you through exactly how I transformed my editing process – and how you can do the same, whether you’re shooting weddings, portraits, events, or any other type of photography.
The Real Cost of Slow Editing (Beyond Just Lost Sleep)
Before we dive into solutions, let’s talk about what inefficient editing actually costs you as a photographer:
Time Pressure: Clients expect timely delivery. The longer they wait, the less likely they are to refer you or book again.
Volume Overwhelm: Modern photographers often deliver 300-800+ images per session. At 30+ seconds per photo, that’s hours of editing time.
Consistency Nightmare: Manually adjusting every photo makes it nearly impossible to maintain a cohesive look across an entire gallery.
Client Expectations: Today’s clients expect professional, polished results with quick turnaround times.
Business Growth: Every hour spent editing is an hour not shooting, marketing, or developing your business.
I learned this lesson during my early years as a photographer – great content, happy clients, but I was spending more time editing than actually creating and growing my business.
Building an Effective Lightroom Presets Workflow
Here’s what I wish someone had told me earlier: presets aren’t just about applying a look – they’re about creating a systematic Lightroom presets workflow that handles the variety of shooting conditions while maintaining professional consistency across your work.
Think of presets as your editing foundation. Just like a chef has signature recipes that can be adapted for different occasions, you need editing solutions ready for various lighting conditions, shooting scenarios, and client needs.
My 4-Stage Universal Preset System
After shooting hundreds of sessions across different photography genres, I’ve developed a four-stage system that handles 95% of my images:
Stage 1: Technical Correction
- Exposure balance and recovery
- Highlight and shadow adjustment
- White balance correction
- Lens corrections and basic cleanup
Stage 2: Style Foundation
- Color grading and tone curves
- Contrast and clarity adjustments
- Vibrance and saturation tweaks
- Your signature look application
Stage 3: Scenario-Specific Presets
- Indoor/artificial light preset
- Outdoor/natural light preset
- Mixed lighting balancer
- Low light/high ISO rescue preset
Stage 4: Final Polish
- Individual adjustments for hero shots
- Skin tone refinements
- Creative decisions and artistic touches
This system lets me process entire galleries in under an hour, with only 10-15% of images needing significant individual attention.
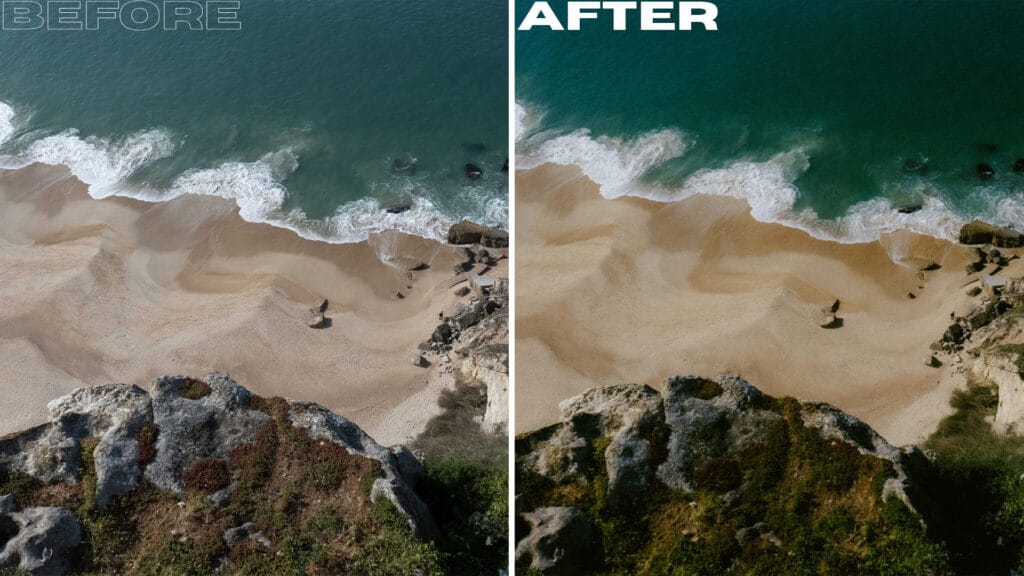
Real-World Case Study: A Portrait Session Transformation

Let me show you this workflow in action with a recent portrait session I shot in Lisbon’s Gulbenkian Garden.
The challenge: Classic photographer’s dilemma – started with soft morning light for formal headshots, moved to dappled shade under trees for candids, then finished with golden hour portraits in open areas. Each lighting scenario traditionally requires different manual adjustments.
Without presets: Each lighting change would have required 8-12 manual adjustments per photo. With 140 delivered photos, that’s roughly 2+ hours of editing time.
With my preset system:
- Applied technical correction preset to all 140 photos: 1 minute
- Applied appropriate style and scenario presets by lighting condition: 9 minutes
- Individual fine-tuning for 15 key portraits and family group shots: 16 minutes
- Total editing time: 26 minutes
The result? A cohesive gallery delivered within 24 hours that perfectly captured the client’s personality while maintaining my natural style.
The 6 Biggest Preset Mistakes (And How to Avoid Them)
After teaching this workflow to dozens of photographers, I’ve seen these mistakes repeatedly derail efficient workflows:
Mistake #1: Treating Presets as Final Results Presets are starting points, not endpoints. Always fine-tune based on the specific image and shooting conditions.
Mistake #2: Using Too Many Different Presets Stick to 4-6 core presets that match your signature style. Consistency across your portfolio is more valuable than variety.
Mistake #3: Ignoring Technical Corrections First Always handle exposure, white balance, and basic corrections before applying creative presets.
Mistake #4: Not Adapting to Shooting Conditions Your sunny outdoor preset won’t work for indoor portraits. Have variations ready for different scenarios.
Mistake #5: Batch Processing Everything Some photos (key portraits, detail shots, important moments) deserve individual attention regardless of your workflow.
Mistake #6: Perfectionism on Every Single Image Focus your detailed editing time on the images that truly matter. Not every photo in a 400-image gallery needs pixel-perfect editing.
Advanced Editing Efficiency Techniques
Once you’ve mastered the basic workflow, these techniques can save even more precious time:
Smart Collections for Organized Processing
Set up smart collections that automatically sort by:
- ISO ranges (helps identify lighting conditions)
- Lens used (different focal lengths often need different treatments)
- Time of day (natural light progression)
- Camera settings (aperture/shutter combinations)
Keyboard Shortcuts for Speed
Speed is everything in professional editing. Essential shortcuts include:
- V for black and white conversion testing
- Ctrl/Cmd + Shift + C/V for copying/pasting settings across similar shots
- G for grid view to quickly scan and select similar images
- Tab to hide panels for distraction-free editing
- F to cycle through screen modes
Strategic Sync Settings
Instead of one-by-one editing, select groups of images shot in similar conditions:
- All portraits from the same lighting setup
- Group shots with consistent background/lighting
- Detail shots with similar styling needs
Preset Adaptations for Different Photography Styles
Your preset system should flex based on what you shoot. Here’s how I modify my core presets:
Portrait Photography:
- Subtle skin softening
- Warm color temperature for flattering tones
- Careful highlight management for even skin exposure
Wedding Photography:
- Multiple presets for ceremony, reception, portraits
- Quick fixes for mixed venue lighting
- Consistent romantic color grading
Commercial/Business Photography:
- Cooler, more professional color balance
- Higher clarity and contrast
- Clean, modern aesthetic adjustments
Landscape/Travel Photography:
- Enhanced natural colors
- Dynamic range optimization
- Weather-specific adjustments (overcast, golden hour, blue hour)
The Business Impact: Why Speed Matters for Every Photographer
Since implementing this workflow three years ago, the changes in my photography business have been transformative:
- Client turnaround time: Reduced from 2 weeks to 3-5 days
- Client satisfaction: increase in referrals due to faster delivery
- Work-life balance: No more weekend-long editing marathons
- Capacity growth: Time saved allowed me to book 35% more sessions annually
- Quality consistency: More uniform results across all my work
Building Your Personal Preset Collection
Creating presets that actually work for your photography style requires understanding your unique shooting patterns:
Start with Your Best Work: Analyze your favorite 20-30 images and identify what makes them special. These become the foundation for your signature presets.
Test Across Your Typical Conditions: Your presets should work reasonably well across the lighting and scenarios you encounter most often.
Focus on Your Common Challenges: Create presets that specifically address your frequent problems – harsh midday sun, low indoor lighting, mixed color temperatures.
Document Your Process: Keep notes on when and how to use each preset. This prevents confusion during busy editing sessions.
Making the Transition to a Lightroom Presets Workflow
If you’re currently editing every photo manually, here’s a gradual transition plan:
Session 1: Use presets as starting points, then edit manually as usual. Learn how each preset affects your typical shooting scenarios.
Session 2: Try to complete 60% of your images using preset workflow with minimal fine-tuning.
Session 3: Challenge yourself to use the full preset system on a smaller shoot (like a mini session or portrait sitting).
Session 4+: Implement the complete system while timing yourself to track improvement.
The Bottom Line for Modern Photographers
In today’s competitive photography market, efficiency isn’t just nice to have – it’s essential for survival and growth. Your ability to deliver quality images quickly determines your success and client satisfaction.
A well-designed preset workflow isn’t about cutting corners or compromising your artistic vision. It’s about systematizing the technical aspects so you can focus on what truly matters: capturing amazing moments and growing your business.
The goal isn’t to become a post-processing robot; it’s to establish efficient systems that let you deliver professional results consistently while freeing up time for creativity, client relationships, and business development.
Whether you’re a part-time photographer trying to reclaim your evenings or a full-time professional looking to scale your business, the right preset workflow can be transformative.
Ready to revolutionise your editing workflow?
Start with my free Lightroom keyboard shortcuts guide – these time-savers work with any photography style and will immediately speed up your editing process.
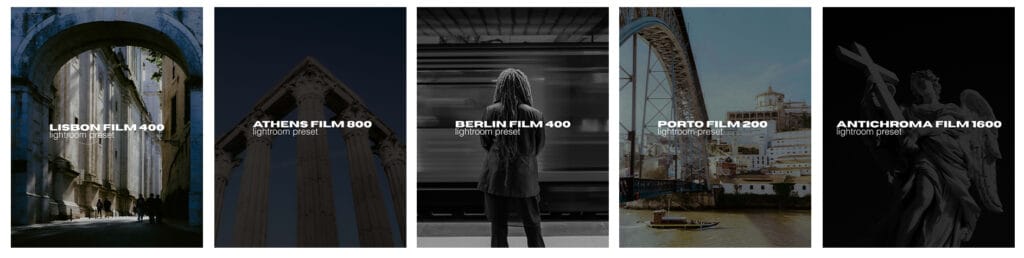
Want to test drive a professional preset?
Try my signature Lisbon 400 Film preset completely FREE using code BLOGGERS at checkout. This film-inspired preset is perfect for testing how presets can transform your workflow.
If you love the results and want to explore more, use the same code BLOGGERS to get 25% off my complete Film Preset Bundle – the exact collection that cut my editing time by 83% and has been refined through hundreds of real-world sessions.
Questions about implementing a preset workflow for your photography style? Drop me a line at hello@arthurgphoto.com – I love helping fellow photographers work more efficiently and grow their businesses.